Question: “Is it possible to change the settings in a SharePoint Online site or library to default the documents we open to View- only instead of Editing?
More details: “If someone wants to edit, they can then click on the editing feature and edit the document. This would help people from making changes by accident to a document.”
The short answer is no.
There is no setting at this time (as of August 2021) to have all files automatically open in read-only mode for an entire library or an entire site.
Why: Files are designed to always open in edit mode by default when you click the file name/document title in SharePoint Online.
However, there are few options you can take to achieve a similar result. Each has pros and cons. I have ordered the solutions in priority order of what I would recommend.
- Open the File in Preview
- Protect the File to Always Open in Read-Only Mode
- Turn on the Required Check Out setting (Last Resort)
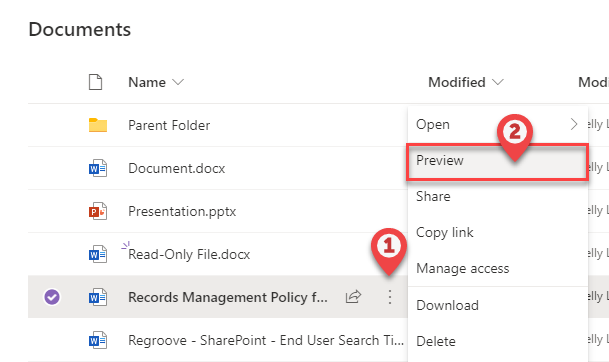
Open the File in Preview
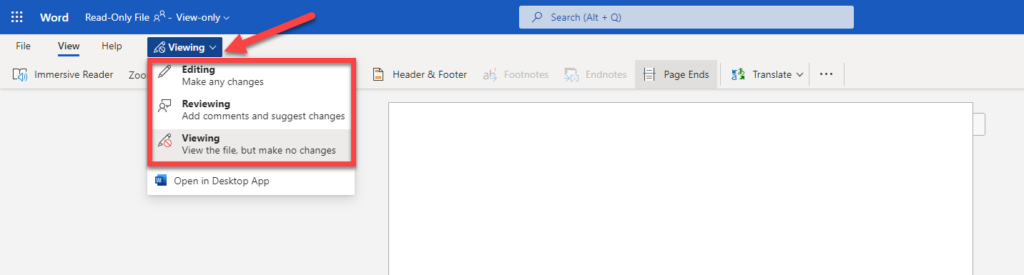
The user can press the Preview button in the More menu to open a file in the browser to read it. The user can switch from Preview to Editing with two button clicks.
Downsides:
- The user can easily forget to remember to press the Preview button.
How to Open a File in Preview:
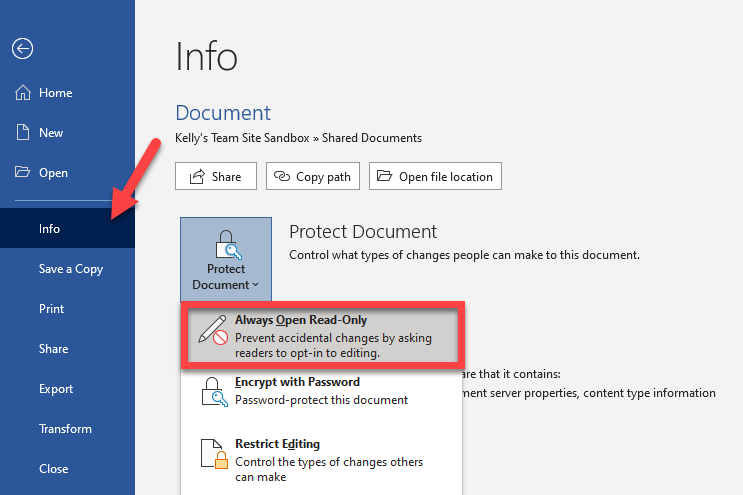
Protect the File to Always Open in Read-Only Mode
Once setup, the user can press the File Name to have the file always open in read-only – both in browser and in desktop app. The user can switch from Viewing to Editing with one button click in the browser and desktop app.
Downsides:
- You have to apply this setting at the document level to every document.
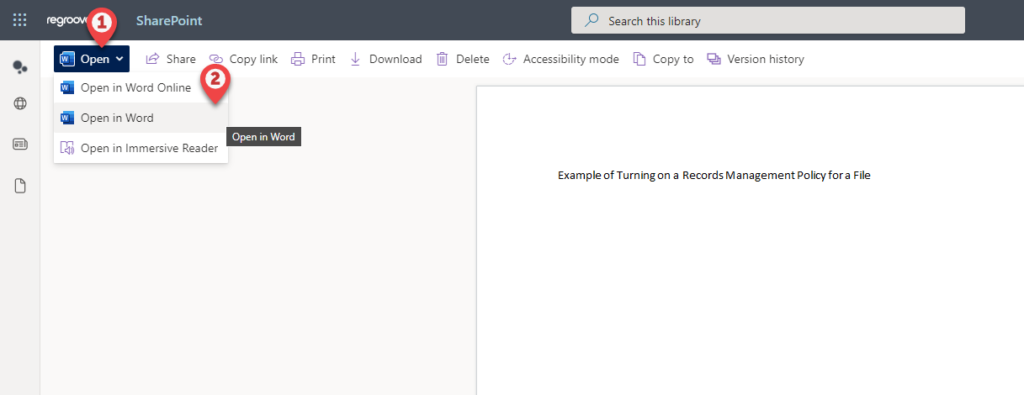
How to Protect A File to Open in Read-Only:
- Open the file in Word Desktop app.
- Go to Info >
- Protect Document >
- Always Open Read-Only >
- Save file.
Turn on the Required Check Out
Some people turn on the required check out setting for the document library.
Files that are clicked on will open in the browser in read-only view, however, to edit the file, it will now take a LOT of steps to edit a document.
Downsides:
- There is not a quick “check out” button when the file is open in read-only in browser.
- It takes 10+ clicks to edit a file that is shared using a sharing link via email (as you have to locate file then follow 8 steps above).
- This setting is turned on at the library level and affects all files in the library.
- Real-time collaboration/co-authoring by multiple editors at the same time is turned off when you turn on required check out.
How to Edit A File After Required Check Out is turned on:
- Close the file
- Locate the file
- Select the file.
- Open the more menu.
- Open the More sub-menu.
- Press the check out button.
- Click the file name to open the file (which will now open in browser in edit mode).
- Check file back in to unlock it/make their changes visible after they are done editing.
Note: Any changes made to file will not be visible to other site members until author checks their changes back in. File is also locked for editing by that user until they check it back in.
How to Turn on Required Check Out:
Set up a library to require check out of files – SharePoint (microsoft.com)
Hi,
I have exactly the reverse problem. Or rather, I have what this person asks for and where you said it isn’t possible.
When I open a Word file in SharePoint online, and I select Open in Desktop App, the file opens as Read-only. And I have to Save as and then upload it again manually to my SP library. Incredibly annoying!! And it happens all over my SP site, all libraries.
Does anybody have a solution on how to fix that?
Having checked that the file is indeed not set to open in read only by default (step 2 in this guide) which I presume is NOT the case since this happens a lot, I can guess that Office doesn’t trust your documents as you open them from the web.
Office uses a concept called “Trusted locations”. You or your IT department should configure your Office applications to trust SharePoint Online and OneDrive for Business.
Support link:
https://support.microsoft.com/en-us/office/add-remove-or-change-a-trusted-location-7ee1cdc2-483e-4cbb-bcb3-4e7c67147fb4