Nothing makes me crankier than an inbox full of emails sitting there nagging at me to attend to them. In the near future I will be sharing a more detailed version of the story of how I change my outlook on email and achieved inbox zero using OneNote. It was a painful process that took far too long, but was well worth the effort. There’s something magical that happens to your mind when you tidy an overcrowded space and make room for ideas to flow.
For those of you who prefer the cut to the chase version, here are the technical step by step instructions here and three Pro Tips I’ve discovered along the way. Check it out:
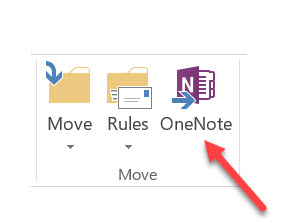
To send a selected email message to OneNote:
Step 1 – Open an email you want to store in your OneNote notebook.
Step 2 – Click on Send to OneNote button to open the Select Location in OneNote dialog box.
Step 3 – Select the Notebook and the Section where you want the email to be stored.
Step 4 – Press OK.
Step 5 – Wait a moment. OneNote will open and you will see a copy of the email to be moved into your Notebook.
“Picture or It Didn’t Happen” Screenshots:
Step 1 and 2:
Step 3 and 4:

Step 5:
Here are three Pro Tips to take your Send to OneNote skills to the next level:

Pro Tip #1 – Don’t see the location where you want to move your email in the list of options in the Select Location in OneNote dialog box? Fret not. You are not resigned to scrolling infinitely or clicking your way down the rabbit hole to find what you seek. An often overlooked feature is the ability to search for a location using text. Here’s how:
To search for a location using text, place your cursor in the “Search by Text in Title” field and start typing to watch the options filter before your eyes!


Pro Tip #2 – Stuck in an endless loop of *click* *click* *click* as you move one email at a time into your OneNote Notebook? Other than creating an ideal time to catch up on your Netflix, the monotonous task feel is yawn-worthy and a great way to get repetitive strain syndrome in your pointer finger. There is an easier way! You can move multiple emails into OneNote at once.
To move multiple emails at once, select the batch by holding down SHIFT or CTRL and clicking to select with your mouse, then press the Send to OneNote button. All the emails end up in the same location which is why using a Quick Notes section as the location can speed up the process. Each email will end up on its own page unless you use Pro Tip #3!

Pro Tip #3 – Wish that each email didn’t have to be on its own page in your OneNote notebook? I feel you. Moving clutter from one room to another doesn’t eliminate the clutter. Fortunately there is a way to keep the number of pages you generate to a minimum. You can move the content of an email onto an existing page if you desire.
To move the content of an email (or multiple emails) onto a single page, follow the regular steps in how to send a selected email message to OneNote. Before you hit Step 4 and click OK, stop and drill down one more level and select a page. The content of the email will appear at the bottom of the page in a separate note container.
Hello Kelly, I learnt a few tips, it’s always worth reading your posts ! Thanks.
I am now impatient to read the “Episode 2” : how do you manage to avoid “Moving clutter from one room to another” ?
Hi Kelly, love the tips on moving emails to OneNote, especially, into a single page.
I find whenever I move an email to the page, it “pastes” it at the bottom of the page. Is there a way of “sorting” the emails on OneNote so that whenever I move the email from Outlook to the OneNote that the “most” current email is at the top of the email i.e. sort of having emails arranged in chronological order where the most recent email is at the top?
Regards, Bill