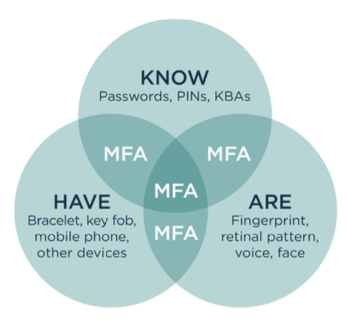
Setting up Multi Factor Authentication for your users in Azure AD has honestly never been easier. Bit of a shocker but it’s true!
The process guides your users through a series of steps that require them to register their security info and choose an authentication method. The process can take less than 5mins. And they can do this all on their own!
Note: Setting this up requires Azure AD Premium P1 licensing. If you are an organization utilizing the free tier of Azure Active Directory licensing see this article from Microsoft for an alternative solution. HERE
Requirements to set this up
- Azure AD Premium P1 licensing (minimum) for all users. This can be an add on or licenses that include this, such as Microsoft 365 Business Premium, and Microsoft 365 E3.
- Turn off Security Default in your Azure AD tenant if they are currently on. See HERE for details.
- A security group that includes all your users as members. This group will be assigned to the Conditional Access policy.
NOTE: It is highly recommended to test out this process before enabling it for all users. Choose a test user with a valid license to verify and review the results are as you expected. Once you are satisfied with the results then assign the security group that contains all your users.
Requirements for this to work
- Accepted forms of Authentication methods require a smart phone for either Text or call verification.
- An authenticator app can also be used but it too requires a smart phone to be installed on.
- Hardware tokens are another option if users do not have a smart phone or are unwilling to use their personal ones. Some examples of hardware tokens include: RSA or Token2
NOTE: Office phones and email addresses are not supported methods for Azure primary authentication methods. An email can be used for security registration purposes. An office phone can be configured for Windows Hello verification (but this is not MFA only an optional login method for Windows 10) See more on this HERE
Step 1 – Create the user security group that will be assigned to the Conditional Access policy
Step 2 – Configure authentication methods
- Sign in to the Azure portal using an account with global administrator permissions.
- Select Azure Active Directory, then choose Security from the menu on the left-hand side
- Choose Authentication methods and configure those you wish to enable for users. Assign the security group created previously to those methods you have enabled.


- From the Authentication methods page select enable combined security. This will enable users to register and manage their security info for MFA. Choose “Users can use the combined security information registration experience” and add the security group created above.


Step 3 – Create the conditional access policy
- From the Azure portal choose Azure Active Directory, Security, Conditional Access
- Create a new MFA policy with the following settings (I am using a group called MDM Users as my security group in these examples)


Select Conditions and choose:
- Any Device
- Any Location
- Select All Client Apps
- All Device State


Once the policy is enabled your users will be notified that More Information is Required if they attempt to access/login to any Office 365 or Azure service. This will trigger the set up for MFA and guide users through the process to choose an authentication method, verify their identity and register their security information.