Step 1 – Plan it out
Before you begin your mission to start moving your On-Premises Virtual Machines to Windows Azure there are a couple of things you might want to consider.
- How much will it cost to run your VM in Azure or Park it?
Azure has a nice little Cost Estimator Tool that can be used to monitor the resource usage of VM’s based on Size, I/O, memory and processing. The output will provide an “Estimate” of cost for running the VM in Windows Azure.
- What type of Azure Storage will you need?
There are different types of Storage options to consider Windows Azure. You will need to choose between Standard and Premium Storage Accounts and you will need to determine what type of Replication and HA (High Availability) service you will want to subscribe to.
Step 2 – Prepare your Azure Subscription
- Create an Azure Account
If you have an Office 365 Tenancy you should have access to create an Azure Account from the Office 365 Administration Console. If you do not have a tenancy then you can open an Azure Account for Free.
- Create Azure Storage Account
- Create Azure Container
Step 3 – Install Windows Azure PowerShell
On the system where you will upload the VM to Azure you will need to install Windows Azure Powershell. Once installed you can either open the Azure PowerShell cmd shell or you can Import-module Azure from Windows PowerShell cmd shell.
Step 4 – Connect to Azure Account
On the system where you will upload the VM to Azure open Windows Azure PowerShell and type: Add-AzureAccount
You will be prompted to login to your Azure account and your credentials will be cached to the system.
Step 5 – Backup the VM(s) to be uploaded to Windows Azure
If you wish to upload your VM as a template then you will need to use SYSPREP against the original machine
If you wish to move your VM from On Premises to Windows Azure entirely (or maintain a parked copy) then ensure you have a backup before proceeding
Step 6 – Convert your .vhdx disk to .vhd
VHDX format is not supported in Windows Azure and must first be converted to VHD
Convert-VHD –Path c:\test\MY-VM.vhdx –DestinationPath c:\test\MY-NEW-VM.vhd
Step 7 – Select your Azure Subscription
From Windows Azure PowerShell type: Select-AzureSubscription -SubscriptionName NameofSubscription
If you miss this step you may receive an error about “resource” cannot be found
Step 8 – Upload VM to Windows Azure
From Windows Azure PowerShell type:
Add-AzureVhd -Destination “<BlobStorageURL>/<YourImagesFolder>/<VHDName>.vhd” -LocalFilePath <PathToVHDFile>
Where BlobStorageURL is your Resource URL (IE> https://company.blob.core.windows.net), ImagesFolder is your Storage Container name and VHDName is the name of the .vhd file you are uploading
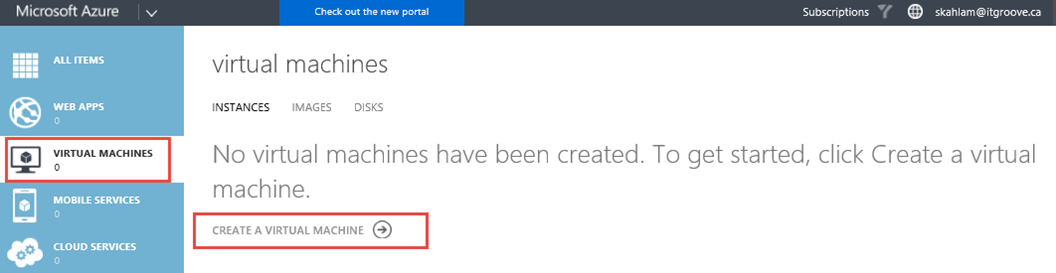
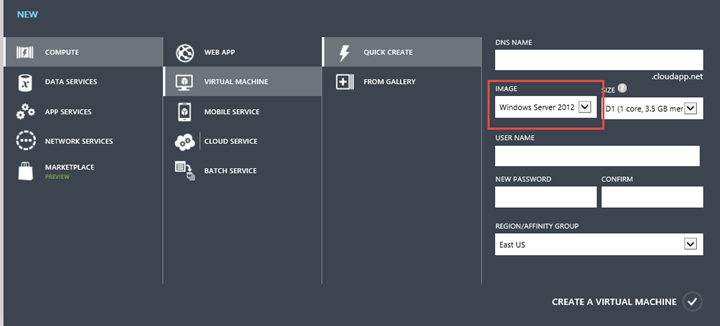
Step 9 – Create Virtual Machine
From Classic Azure portal click on Virtual Machines
- Click Create Virtual Machine
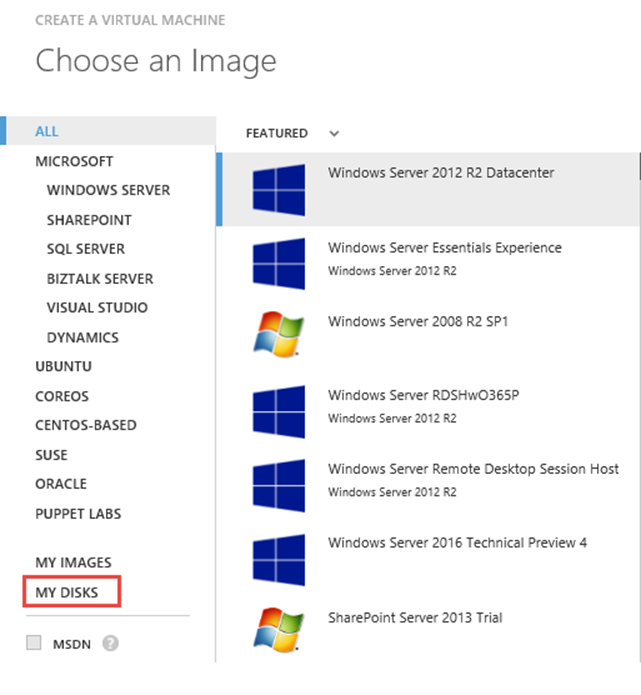
- Drop down the Image selection and choose My Disks
- Continue with the process to create the Virtual Machine and once complete you will be able to view and manage the new VM in either portal Classic or New Azure.