
In the modern workplace, various apps and tools flash alerts at us throughout the day. These notifications can make it difficult to focus on our work. Did you know that it can take up to 23 minutes to refocus after checking just one email or chat? I learned that fun fact in the MyAnalytics dashboard.
Keep reading to learn how you can reduce your daily distractions by changing a few settings in Office 365 and Windows 10.
Set Your Status as “Do Not Disturb” in Microsoft Teams
Set your status as “Do Not Disturb” in Microsoft to mute all notifications other than messages that are urgent or from priority contacts.
I’m very easily distracted by notifications, so I often use Do Not Disturb in Teams to maintain my focus at work.
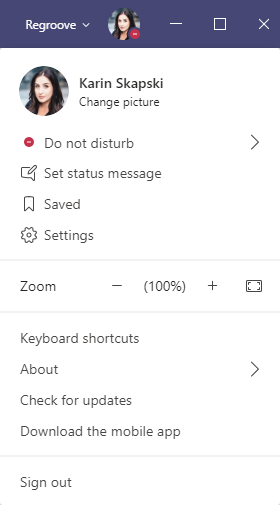
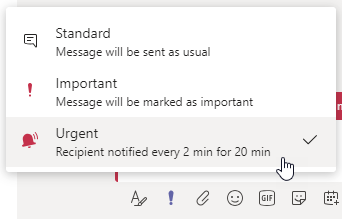
The Do Not Disturb status can sometimes appear standoffish. To avoid appearing rude, I’ve explained to my coworkers why I use it and asked them to send their chat messages as Urgent for time-sensitive requests.
Enable Quiet Hours/Do Not Disturb in the Microsoft Teams and Outlook Mobile Apps
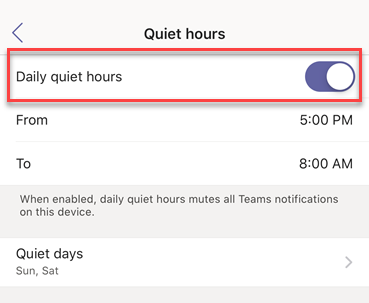
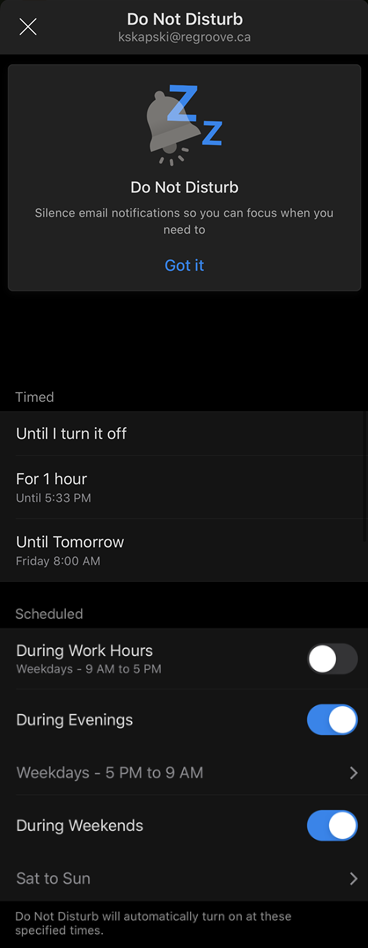
Microsoft Teams and Outlook both have the option to mute mobile notifications for a specified time frame.
To set Quiet Hours n the Microsoft Teams mobile app, tap the menu icon, then Notifications. Next, tap Quiet Hours.
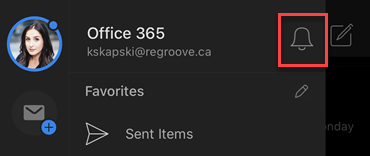
Set up Do Not Disturb in the Outlook mobile app by tapping on your Office 365 user image, then tapping the bell icon across from it in the flyout menu.
Adjust Your Notifications Settings
Outlook on the Web
To configure notifications in Outlook on the Web, click on the Settings cog in the Office 365 suite bar. Next, scroll to the bottom of the Settings flyout panel and click “View all Outlook settings”. Next, navigate to General, then click on Notifications.

Microsoft Teams Desktop App
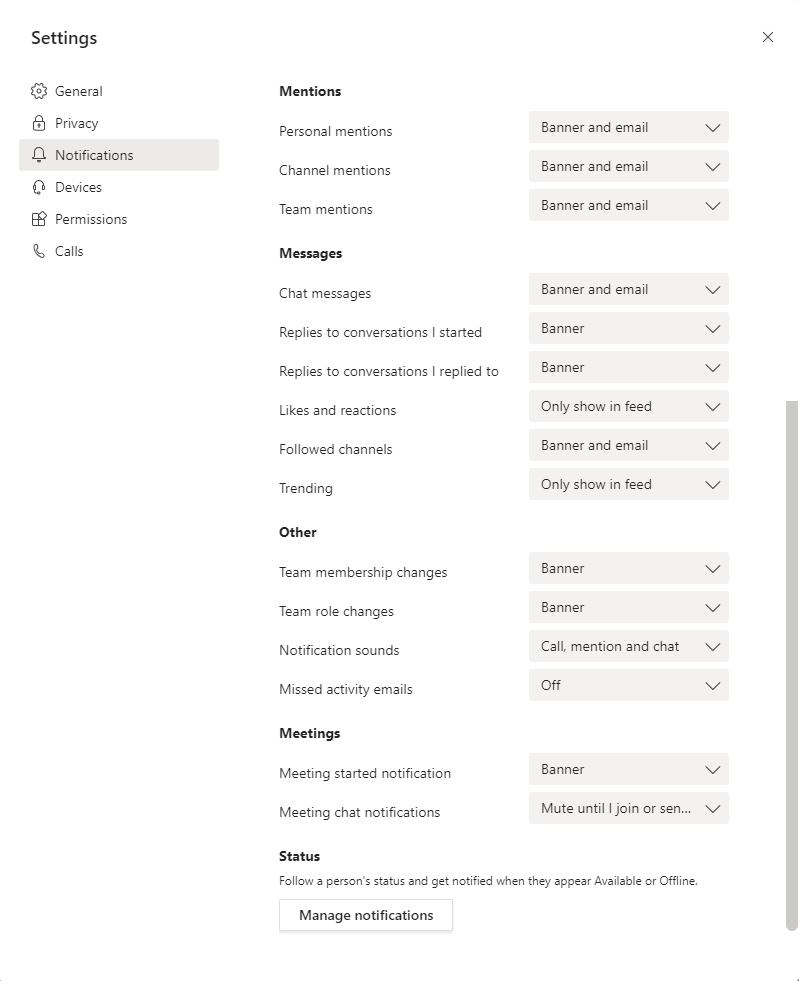
You can adjust Microsoft Teams notifications in your personal settings, for any Teams channel, and for each of your chat messages.
Click on your Office 365 user photo in the top right of your Teams window. To adjust your personal notification settings for Microsoft Teams, click on Settings, then on Notifications.
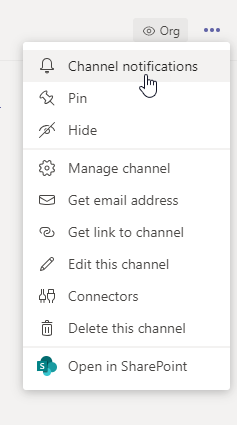
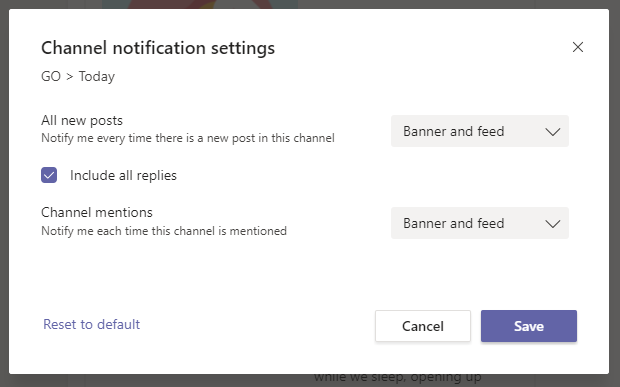
Click on the vertical ellipses in the top right of a channel window, then click on Channel Notifications to adjust its notifications settings.
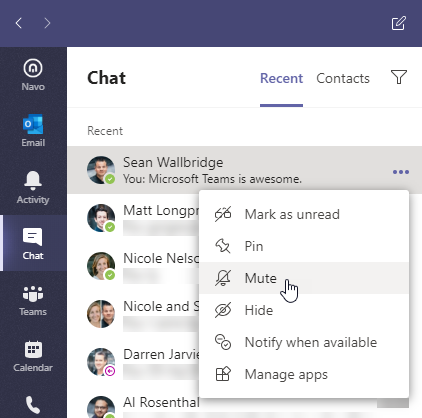
Click on the ellipses beside a chat and then on Mute to mute it. I don’t mute individual chats, but I do mute group chats when messages run rampant.
Turn On Focus Assist in Windows 10
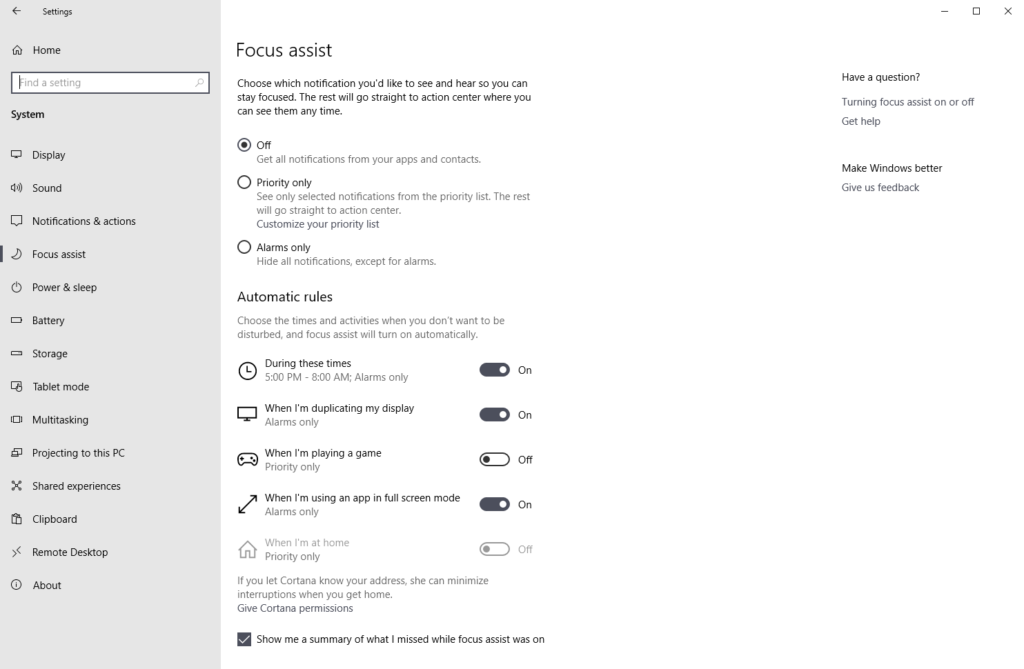
Focus Assist in Windows 10 allows you to minimize or mute notifications and can be configured in Windows 10’s Settings under System.
You can set automatic rules that enable Focus Assist during specified hours of the day or for different scenarios, like duplicating your display.
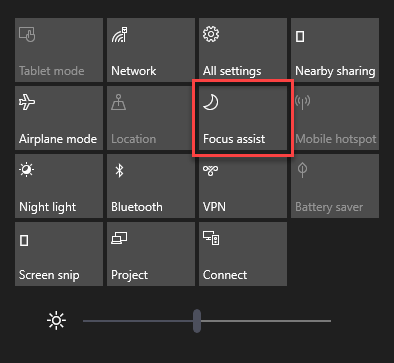
To quickly enable and disable Focus Assist from your taskbar, click on the Action Center icon. Next, click on Focus Assist to toggle through Focus Assist modes.
For more information on the features I mentioned in this post, read the following documentation from Microsoft: